Friday, December 31, 2010

Coconut Barfi - Happy New Year!!!


Wish you all a very happy & a prosperous new year! 
It's time to celebrate yet another beginning!! 
Kuch meetha ho jaye :)


Quick & Easy! Made very often at our place.

Ingredients:

  • Milk - 1 ltr
  • Grated Coconut - 2 cups
  • Sugar - 1 cup
  • Ghee - 1 tbsp
  • Powdered Cardamom - 1/2 tsp
  • Dry fruits - Optional


Method:
Take a pan & heat milk on medium flame. When it starts boiling add the grated coconut & lower the flame. Let it cook for sometime. You will see that boiling makes the milk thicker with layers of cream forming on top. Stir it once in a while to avoid settling of coconut at the bottom of the pan & getting burnt. Add sugar after 10 minutes.Keep stirring till the milk & coconut become thick & stick together. Now, add the powdered cardamom & the ghee.You can choose to add some chopped dry fruits to make it nutritious & rich.
When done pour it in a greased plate & you can cut them in the shape you desire. The most common shape is  of a diamond.

Note:

  • The sugar can be put according to taste. 
  • Many recipes will make you fry the grated coconut & add it to a sugar syrup & may be just  2-3 tbsps of milk only. But I stick to my mother's recipe given above.

Thursday, December 16, 2010

Sweet & Tangy Thick Tomato Preserve

My Grandma used to prepare this for me each time I went to Chennai during my summer vacations. She is no more! But my mother makes it every time I demand for it. This is mom made which I picked up when I had gone home to see my parents. 
It's delicious & simply irresistible!

Ingredients:

  • Ripe Tomatoes - 1  kg
  • Red Chilli Powder - 3 tbsps
  • Jaggery - 100 gms
  • Asafoetida - A pinch
  • Tamarind - 25 gms
  • Salt - As per taste
  • Oil - 100 gms


Method:
Grind the tomatoes & the tamarind to make puree. On low flame keep a wok & pour the tomato puree, add salt, asafoetida & red chilli powder. Cover the wok with a lid for 2 minutes. Now take off the lid & pour some oil. Break the jaggery into small pieces & add it to the puree. Do not pour all the oil in one go. Slowly once in a while keep adding 2-3 spoons & cover it with a lid for a few minutes again repeat the process till all the oil is consumed. Now let it cook on low flame till it gets thick & starts leaving the wok. It should not stick to the wok. Your tomato preserve is ready within 1 hour if prepared on gas stove. In a microwave it will take around 15 minutes only.

Note:

  • The red chilli powder can be used according to your tolerance to its taste
  • The shelf life of this preserve is over a month
  • You can use it as a jelly/jam on toast or with rolls & chappatis
  • I enjoy it with Idlis & Dosas too


Tomato on FoodistaTomato

Adai - Karthigai Poornima

I am back from my vacation so its time for me share with you all my pending recipes for 
Karthigai Poornima.

ADAI - Is a salty pancake similar to dosa. 

Ingredients:

  • Rice - 2 cups
  • Arhar Dal - 1 cup
  • Black Urad Dal - .5 cup
  • Dried Whole Red Chillies - 4
  • Green Chillies - 4
  • Asafoetida (Hing) - 1 pinch
  • Curry Leaves - Few 
  • Black Peppercorns - 5
  • Salt - As per taste


Method:
Soak the rice, arhar dal & urad dal for 3 -4 hours. Now Grind them in a mixer/grinder along with all the other ingredients till the consistency of the paste becomes a little coarse. When I say little kindly ensure that it is only little coarse rest batter should be smooth enough to make the pancakes. You can check it by taking a small dab between your fingers & rubbing it. Don't worry if the paste comes fine as the adai can still be made.
Now, either you can start preparing it now or else wait for a few hours for the batter to ferment & then start preparing them.
It is to be made similar to dosa on the hot griddle while brushing it with some oil so it cooks well & comes off easily if not using a non stick pan.

Variations:

  • You can use white urad dal instead of the black ones too
  • I have tried mixing both black & white together also & even that tastes great


Note:

  • Adai can be eaten as a snack or even for breakfast
  • It is high in protein as we use lentils in it
  • It can be served with Jaggery pieces, tomato sauce or any sweet & tangy chutney
  • You can add chopped onions to the batter also

Tuesday, November 23, 2010

Karthigai Poornima

I have been enjoying a month long vacation back home so did not find time to post much. Though late at posting this pic too but I want to do it before someone calls me for supper :) I will post recipes of all the delicacies I enjoyed during Kathigai Poornima after I am done with my vacation. 
Catch you guys soon again.


Sharing the clicks but would give out the recipes later.
We made Adai, Pori & Neyyappam!


Tuesday, November 2, 2010

Please bear with me!

My camera is being used for some purpose by my husband who is travelling now so I am not able to click any of my food creations. I feel sad but at least I can see all that my husband clicks :)


Kindly bear with me for a while & soon I will click & upload the pics. Do check out my blog for more that is coming in. 


I really appreciate all your imaginations for the recipes I am posting.


Thanks a ton! :)

Achaari Mirch (Pickled Green Chillies)

Hot! Hot! Hot!
Yeah, this one is a hit with Poori Aaloo.

Ingredients:

  • Thin Green Chillies - 20 
  • Mustard Powder - 3 tsps
  • Turmeric Powder - 1 tsp
  • Jeera Powder - 1.5 tsp
  • Coriander Powder - 1.5 tsp
  • Amchoor Powder - 1tsp
  • Salt - 1 tsp
  • Mustard Oil - 1.5 tbsp


Method:
Mix all the masalas in a bowl. The mustard powder, turmeric powder, Jeera Powder, Coriander Powder, Amchoor Powder & Salt. Put enough water & get it to a thin watery consistency. Slit the green chillies in the middle lengthwise.
Heat a wok & pour the mustard oil in it. When it is about to smoke put the masala paste into it. It will smoke so better you put on that exhaust fan. Now when the masala starts leaving oil from the sides add all the green chillies to it & mix in. Cover the wok. After half a minute check the chillies & saute. Repeat this process a few times till the chillies are done. It will take 6-8 mts for this process.Your chilli pickle is ready to be served.

Note:
1. If you want to add more chillies then you will have to increase the masalas & oil sufficiently
2. This goes best with poori aaloo, paranthas, rice & dal.
3. You will like it with sooji halwa too
4. Easiest pickle to make
5. If you do not like mustard oil then use any other vegetable oil
6. It can be kept for a week if enough oil & salt is used

I am sending these pickled green chillies to Any One Can Cook hosted by Ayeesha. These can be made by anyone so are FB (For Beginners), WLI (With Less Ingredients) & WMT (With Minimum amount of Time).
Hope you enjoy them!


Wednesday, October 6, 2010

Flour Laddoos - Makai & Wheat


It is healthy & very very easy to make. It is made of Corn Flour not Corn Starch. Please do not use the corn flour which actually is the starch of the maize grain used to bind food products. Corn Flour is the powdered form of Corn.


Ingredients:

  • Makai Atta (Corn Flour) - 3 cups
  • Wheat Flour - 1.5 cup
  • Jaggery - 250 gms
  • Ghee - 2 tbsps
  • Chopped Cashew Nuts - 1/3rd cup
  • Chopped Almonds - 1/3rd cup
  • Raisins - 1/3rd cup
  • Powdered Cardamom - 1 tsp
  • Ginger Powder (Saunth) - 1 tsp
  • Cloves - 8 


Method:
Take a pan & pour 2 tsps ghee & fry the cashews, almonds, raisins & cloves. Take out & keep aside. Now, put the jaggery with some water & let it dissolve. Now, Add the corn flour, wheat flour & ghee & stir till the ingredients are completely mixed & becomes smooth. Add the powdered cardamom, ginger powder & the fried dryfruits & cloves. Mix well. Put off the flame. Before it cools take small quantity & make round shaped laddoos with the help of your hand. If required you can grease your hand with some ghee to help you get perfect round shapes. Cool & keep in air tight containers. It can be stored for a few days.

Note:
1. You can increase or decrease the amount of dry fruits according to your liking
2. The same can be made with only wheat flour
3. It's a quick snack

Saturday, October 2, 2010

Smoked Tandoori Veggies

You think you need a tandoor for this preparation? 
NO! Keep reading :)

Ingredients:


  • Cauliflower Florets - 2 cups
  • Onions - 2 Medium sized
  • Capsicum - 2 Medium sized
  • Baby Potatoes - 10
  • Cottage Cheese (Paneer) - 250 gms
  • Coriander - For Garnishing
  • Lemon - 1
  • Salt - As per taste
  • Oil - 2 tablespoons
  • Chaat Masala - As per taste


For Marination:

  • Curd - 1/2 kg
  • Gramflour (Besan) - 2 tsps
  • Ginger Garlic Paste - 2 tsps
  • Green Chilli Paste - 1 tsp
  • Salt - As per taste
  • Edible Red Color - 2 pinches


Special Ingredients:
Coal - 1 medium sized
Oil - 2 tsps

Method:
In a pressure cooker cook the baby potatoes on medium flame & put it off right after the first whistle. After the steam is out take out the baby potatoes & cool them. Peel off the skin carefully without breaking the potatoes. It should be intact. Poke holes carefully in the potatoes with the help of a fork or a toothpick. Next dice the cottage cheese. Parboil the cauliflower & takeout of the water to cool it.
Prepare the marination paste by mixing all the ingredients together. Now, put the baby potatoes & the cauliflower florets & the cottage cheese in the paste & cover them completely with the coating & leave for an hour.
Meanwhile heat a non-stick pan & add oil. When ready add the diced onions & after 2 minutes add the diced capsicum. Saute till they turn translucent. Now add the cauliflower florets & the baby potatoes with the marination. Saute for another 3 minutes. Now, add the cottage cheese. Cover & cook & continue to saute every second minute for another 10 minutes. When they are done put off the flame & turn them into a bowl & keep aside. Heat the coal on an open flame to ignite it & then transfer it into a bowl. Carefully lift the bowl with the help of tongs & place it on top of the vegetables. Be ready with a lid to cover the larger bowl containing the vegetables. Pour the oil on the coal & immediately cover it with the lid. Leave it for 5 minutes. Then take out the smaller bowl & throw the coal. This is called Smoking which helps us in getting the tandoori like taste. Garnish with coriander & serve hot with chutney. Add the lemon extract & sprinkle some chaat masala for a tang.

Note:
1. You can use ghee instead of oil when smoking
2. You can try making just a tandoori paneer, tandoori gobhi or a tandoori aaloo
3. Best to make for evening snack or as a starter


Friday, October 1, 2010

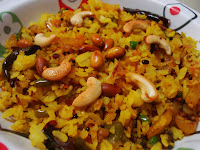
Wow Poha!

Quite a snack! A very healthy, tasty, easy & time saving snack. Once I got it to the office & all my colleagues loved it. Since then I have started bringing it for them at least once a month for breakfast. There are various variations made by Indians depending on their taste as well as the state they belong to. 


The recipe to make it the WOW way (my way) is...


Ingredients:
Poha (Beaten Rice) - 1/2 kg
Onions - 3 medium size (Thin sliced)
Tomatoes - 3 medium size (Thin sliced)
Potato - 1 medium size (Chopped)
Capsicum - 1 medium size (Chopped)
Green Peas - 1 cup
Peanuts - 1/2 cup
Cashew Nuts - 1/4th cup (Chopped)
Green Chillies - 3 (chopped)
Whole Red Chillies - 2
Mustard Seeds - 2 tsps
Urad Dal - 3 tsps
Curry Leaves - 15 (Chopped)
Lemon - 1
Salt - As per taste
Oil - 1 tbsp
Turmeric Powder - 2 tsps
Red Chilli Powder - 1 tsps


Method:
Wash the poha & drain out the water. You could use a colander. Now add the lemon extract, chopped green chillies, curry leaves & some salt in it. Mix it & keep aside. It will help the poha absorb them.
Now take a pan & pour oil. When it is hot put the oeanuts & saute till it is done. Take them out & keep aside. Lower the flame & fry the cashew. Be careful as it will change color very fast. Take out & keep aside with the peanuts. Now, add mustard seeds to the oil & let it crackle. Then add the urad dal & saute. When it changes color to light brown add the whole red chillies to it & then put the chopped onions to it. When the onions turn pink & translucent add turmeric powder, red chilli powder & salt. Now, add the tomatoes & cover the pan. Let it cook till it becomes puree like. Keep checking as it might get burnt when covered. Now, add the Capsicum, Potatoes & the Green Peas. Cover & cook it is done. Keep checking & stirring the vegetables. When the vegetables are well cooked then put in all the poha & mix in the vegetables properly. Add the peanuts & cashews & mix them again. Now, cover the pan & leave for 2 minutes. Take off the cover & stir again. Check for salt & lemon. If required add & mix again. Your healthy & scrumptious breakfast is ready to be served.


Note:
1. Instead of frying you could even roast the nuts & add to your poha
2. You could add other nuts like almonds & pistas too
3. It will also taste good without vegetables
4. I sometimes make it with onions, tomatoes & nuts only & it tastes awesome!

Thursday, September 30, 2010

Punjabi Kadhi - Light & Yummy

Being a south Indian I have always relished the south indian version (about which I will write later). However, when I was in Delhi for my graduation my landlady used to treat me with this special kadhi sometimes. I learnt it from her & make it at home whenever my husband demands. It is the lighter version made without the usual pakodas which are fried & put in it making the kadhi heavy to digest. It is very easy & takes no time to prepare.
Ingredients:
  • Sour Curd - 1/2 kg
  • Gramflour (Besan) - 1 cup
  • Onions - 2 medium sized
  • Red Ripe Tomatoes - 2 medium sized
  • Frozen Green Peas - Half Cup
  • Green Chillies - 3
  • Whole Red Chillies - 2 
  • Water - 750 ml
  • Salt - As per taste
  • Oil - 3 tablespoons
  • Mustard Seeds - 1 teaspoon
  • Cumin Seeds - 1 teaspoon
  • Curry Leaves - 8 to 10
  • Turmeric powder - 1 teaspoon
  • Coriander Powder (Dhaniya) - 1 teaspoon
  • Garam Masala Powder - 1 teaspoon
  • Fennel Powder - 1 teaspoon
  • Kashmiri Red Chilli Powder - 1 teaspoon
Method:
Chop the onions, tomatoes & slit the green chillies lengthwise. Now, take a pan & put 2 tablespoons oil. When the oil is hot put the mustard seeds & cumin seeds & let it splutter. Now, add the whole red chillies after breaking them into pieces. Once they stop sizzling put the onions & green chillies & saute for a while till the onions turn pinkish. Add garam masala, turmeric powder, dhaniya powder, Fennel Powder, Kashmiri red chilli powder (for colour) & the salt. Continue to saute till the masala is cooked & oil leaves towards the sides.Now, add the tomatoes & cover the pan.This entire process needs to be done over medium flame. When you cover the pan the contents will cook faster so there is a possibility of it getting burnt so keep checking. Cook till tomatoes melt & turns into a puree. Blanch the frozen peas & add them now & let it cook. Meanwhile take a bowl & put the curd in it & whip it till the curd is smooth without lumps. Now add the gramflour to this curd & continue to whip. Keep adding water to attain the required pouring consistency. Check the tomatoes now & add the gramflour curd mixture to it & keep stirring till it is completely mixed with the vegetables. Add the curry leaves now. Cover & let it boil. It will start thickening so add more water if required. You do not have to boil it for long. After about 3 minutes you can put off the flame & your punjabi kadhi is ready to be served with hot steamed rice. Enjoy!
Note:
1. Curd should be sour otherwise you will not get the desired taste
2. You can add coriander leaves if you do not have curry leaves
3. It is best enjoyed with plain rice

Teekhi Tamatar Ki Chutney

"Incredible!" is what I call it. My entire family gets bowled over whenever I prepare this. It is best to serve it with plain food like Rice, Dal & Vegetables or any paranthas (flat breads).


Ingredients:
  • Ripe Red Tomatoes - 6 Nos.
  • Green Chillies - 6 Nos.
  • Garlic - 10 to 15 cloves
  • Coriander Leaves - Handful
  • Whole Red Chillies - 2
  • Mustard oil - few drops
  • Salt - As per taste
Method:
Cook the tomatoes one by one directly on the flame. You could use a tawa also however it is best cooked directly over the flame. The tomato skin will blacken & get burnt but you keep turning the tomato with the help of a tong so that all sides are cooked well. When it starts shrinking & getting softer take it off the flame. Likewise cook all the tomatoes. Now in the similar fashion cook the green chillies over the flame. Be careful because if it gets completely burnt then it will lose its taste. Just let it cook till it gets a little soggy.
The same way whole red chillies are to be cooked but it will release strong smell & smoke so please cover your nose & put on your exhaust fan. You only have to heat it to make chilli flakes. Now, use a mortar & pestle to pound the Whole red chillies, garlic & coriander leaves instead of grinding it in a mixer grinder. Remove the skin from the tomatoes & now add the green chillies & tomatoes into the mortar. Continue to pound till you achieve the required consistency. If you see a few lumps of tomatoes & chillies as well as few coriander leaves it is ok. It should not be completely ground else we could have used the mixer grinder isn't it?
Add a 4-5 drops of mustard oil if you like its taste & sprinkle salt as per taste.


Note:
1. You need not put any oil if you wish not to
2. The no. of chillies will completely depend on your liking
3. You can use a mixer grinder however the consistency & taste will vary
4. It is best served with plain food to add punch in the taste

Tuesday, September 28, 2010

Sweet & Tangy Carrot Salad

Winter is nearing. It's time to get fresh & colourful vegetables which is tasty & appealing to our palates. Now, this is a very very simple to make salad which is sweet & tangy & does not consume much time to preapre. The ones who do not like eating raw carrots are going to love this.


Ingredients:
  • Carrots (Orange ones) - 4
  • Lemon - 1
  • Green Chilli - 1
  • Whole Red Chilli - 1
  • Curry Leaves - 6 to 8 leaves
  • Oil - 1 teaspoon
  • Mustard seeds - 1 teaspoon
  • Salt - As per taste
Method:
Scrape the carrots & wash them thourougly. Now we need a shredder (kaddu kass) to shred the carrots. Be careful while shredding I often hurt myself so mostly I prefer letting my expert mother do this part.
Now, slit the green chilles mid way & chop them finely. Put the shredded carrots & the chilli together & put a dash of lemon over it. Now sprinkle salt as per taste. Separately heat oil in a ladle & heat it & when it is ready put the mustard seeds & let it splutter. Add the whole red chilli after breaking it in two. Put off the flame & put the curry leaves in the hot oil. Now, pour this on the carrot salad. Your Sweet & Tangy Carrot Salad is ready!


Note:
1. Freshly shredded carrots are to be used to retain their sweetness
2. For a variation you could use finely chopped tomatoes in the same recipe
3. No. of green chillies will vary depending on their freshness & taste required by individuals
4. This can be eaten with meals or can be separately eaten in the form of a healthy breakfast

Mom's Magic Kashayam (Magical Herbal Drink)

This one is my favorite. After a hectic schedule at work I come back home with fatigue & hunger pangs. This is the time when most of us treat ourselves to tea/coffee & so do I. However, at least twice a week I stick to my mom's kashayam. Kashayam is a Tamil word. In Hindi we call it Kaadha but I like to call it a magic drink as it relieves me of all the fatigue or any stomach & digestion related problems. It should be consumed by us every week at least 2 -3 times at any time of the day. Preferably in the morning hours.


Let me tell you how to prepare it.


Ingredients:
  • Cumin Seeds (Jeera) - 2 teaspoons
  • Peppercorns (Kali Mirch) - 5 pieces
  • Bishop's Weed/Carom Seeds (Ajwain) - 1 teaspoon
  • Black Salt (Kala Namak) - As per taste (optional)
  • Water - 1 litre
  • Basil Leaves (Tulsi) - 10 to 12

Method:
Take a deep vessel/pan & roast the cumin seeds, peppercorns & Bishop's Weed on low flame else they will get burnt. Once they have browned & the aroma spreads put the water in it & increase the flame to medium. Put black salt (recommended) or regular salt. Now do not cover the pan & let it boil. When it starts boiling put the cleaned basil leaves in it. Let it continue to boil uncovered for another 3 - 4 mts. Now reduce the flame to low & do all your other chores. You need not do anything more except waiting till it reduces to half its original quantity. After it reduces to approximately 2-3 cups put it off & let it cool. You will see that the colour of the water is brownish green. Strain & separate the spices & leaves & drink it warm.


Note:
1. The usage of Salt is optional. I drink it saltless as I enjoy the taste of the spices & fresh basil leaves.
2. In case all these spices are not readily available then you can try variations but do not make this drink with peppercorns alone.
3. If the salt version is disliked by your children then try putting some jaggery in it. Just separately dissolve jaggery on low heat & mix it with the strained drink. You can even boil it for some time.
4. It is best consumed to avoid or decrease - indisgestion, eating disorders, cold & cough, fatigue, weakness.
5. Make it a regular drink at home & try variations to develop the taste of the family members.
6. It improves immunity.

Travel Ideas

Do Not Copy - All the material unless otherwise mentioned are copyright of © Relish Delish... .

MyFreeCopyright.com Registered & Protected