Showing posts with label Snack. Show all posts

Thursday, April 24, 2014

Tangy Paneer Do Pyaza

Hello friends! I have been taking too many breaks from my blogging world. Well, all thanks to my juggling between work & home. But, honestly there is nothing better than spending time with your sweet little one. All the tiredness and worries fly away. What do you say?

With little time & opportunity to cook at length we have been managing all kinds of quick food. Honestly we also often end up eating out during lunch due to meetings or because I did not have had enough time to really cook. So, all these days whenever we get an opportunity we try to eat at home and try eating healthy, easy to cook food.

So, I had gone to the grocery store close by and there is a local chinese food vendor cooking on the street. No, I did not eat there but the aroma was too tempting to resist. So, one thing was sure for today I was to cook something chinese. I quickly picked up a packet of Mother Dairy Paneer (Cottage Cheese) and directly went to the sauce section. There I saw the new brand SAMS sauce, my husband did not want to experiment with the sauces but I did. Its an introductory pack of 3 sauces - Soy, Green chilly & Red Chilly. Reached home within 15 mts & headed to the kitchen to cook the TANGY PANEER DO PYAZA. It is cottage cheese tossed in chunks of onions/tomatoes & capsicum. It is generally cooked tangy & hot.


Here's how you make this awesomely delicious & quick dish.


Get hold of:
2 Onions  - Halve them chop them a little thick
2 Tomatoes - Halve them & chop them same as the onions
1 Big Capsicum - Halve it & slice it the same way
4 Green Chillies - Slit them  (add as much/less as you wish to)
Cottage Cheese - Long Slices as thick as the other items
Turmeric Powder - a pinch (you may not add if you wish)
Salt - as per taste
Oil - 1 Tbsp
Tomato Sauce - 2 Tsp
Soy Sauce - 1 Tsp

Method:
Heat the wok & add oil. As soon as it is about to smoke add all the onions, tomatoes, capsicum & green chillies in. Toss till they are just cooked. Add turmeric powder, paneer, salt, tomato sauce & the soy sauce. Toss for a minute and serve hot with Chappatis/Paranthas/Rotis or Noodles. You may wish to serve them just as a snack.


Note:
You may add some vinegar for tang. But just the tomatoes also worked for me.
I do not like frozen paneer, the Mother Dairy or Gopaljee which are soft are good to use. You could even buy the local paneer available in the Indian shops or make fresh paneer at home.
I used Heinz Tomato Ketchup & SAMS Soy Sauce  - We liked the SAMS soy sauce.


Monday, June 3, 2013

The Great Indian Samosa - Potato Fritters

Oh yes! I love Samosas! And I bet you love it too. 

My love for Samosas started when I was a little girl. Every Saturday I used to eagerly wait for my father to bring home those mouth-watering Samosas with hot syrupy Jalebis. This is the best combination.
I do not really know why I still love Samosas so much but what I do know is that I have many many memories around it.

I now live in Gurgaon where I surely do not get the same kind of Samosas as in Bokaro. Actually there are many versions of Samosas which I discovered when travelling across India. And, I have loved every version that I've tasted.

Samosa is also called Singhada in the East. The version that I prepared this time is from this part of the country where it is just heavenly in taste.

In and around Delhi we have these famous Aggarwal Sweets where they make quite nice Samosas too but they put a lot of Garam Masala or sometimes even dry fruits like Cashews & raisins. They do not mash the potatoes well & sometime just fill in cubes of cut potatoes. I have even seen non-vegetarian Samosas filled with mutton or chicken shreds. Have you also tasted Chinese Samosas? I have! They stuff it with noodles.

Once when in Chandigarh I found that the menu read SMOSA (A missing) which is exactly how they pronounce it too. 

So to please me all you guys need to do is invite me over a Samosa Party! :)


To taste my version you will need:


  • Maida (All purpose flour) : 250 gms
  • Potatoes: Boiled & mashed: 4 Large
  • Peanuts: Handful or as per desire
  • Green Chillies: 6
  • Red Chillies: 4
  • Garlic: 1 big pod
  • Salt: As per taste
  • Oil for frying


METHOD:

For the Dough - 
Add salt & some oil ( 2 tbsp) to the maida & make a dough. The dough should not be very soft.
Keep aside.

For the filling - 
Cut Potatoes in halves add salt & turmeric & put to cook till done.
When done, mash it softly
Prepare a paste of green chillies, red chillies & garlic. You could user a grinder or even a mortar & pestle.
Heat a pan & add some oil to roast the peanuts. Remove when done.
Add the chilli garlic paste into the remaining oil & saute for a minute. Now dump the potatoes into this pan & mix in well. Add peanuts & salt to the filling. Keep aside.


Samosa's Cover:
Take a ball of dough goo enough to roll out like a chappatti. Now take a knife & cut it into half.  So now you have 2 semi-circles which will make 2 Samosas.
We will now need some water in a bowl which will help us seal the samosa.

Take one semi-circle & place it circle side down. Pick one corner & fold from the mid point downwards so it covers a half. Now, dip your finger in water & wet the other side - top line. Fold it from the midpoint over the first layer so that the wet portion sticks to the other layer & seals it to make a triangle. Now pick it up softly & fill in the cone shape. Again wet the front edges & bring the circled layer on top of the wet portion to seal it.  Your Samosa is ready.


Prepare them all & then deep fry in medium to low flame to cook it well.

Serve with ketchup, sauce or any chutney.

Do not forget to write back to me if you ever make it.


Note:

  • Garlic can be avoided if you do not like the taste/smell
  • You may add some freshly ground garam masala too


Saturday, April 6, 2013

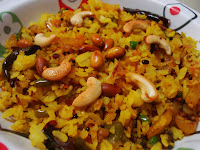
Aloo Kaju Poha (Beaten Rice Stir Fry with Potato & Cashew)

Hi friends!

Back to blogging after a small break. My husband met with a car accident & so that kept me really occupied. He had to undergo a Maxillo-facial surgery to correct the facial fractures & with Lord Shiva's blessings he has recovered well.

Today morning I wanted to eat something light but healthy. So, I thought it is the right day to revisit my blog with yet another version of the Poha that I cook.


We need:


  • Beaten Rice/Poha: 250 gms
  • Potato - 1, chopped
  • Peanuts - handful
  • Cashews - handful
  • Urad Dal/Split White lentil - 2 tsp
  • Asafoetida/Hing - 1/4th tsp
  • Turmeric Powder - 1/2 tsp
  • Whole Red Chillies - 2 borken into 4
  • Mustard seeds - 1 tsp
  • Lemon Extract - as per taste
  • Green Chillies - 2, finely chopped
  • Ginger - 1/2 tsp, finely chopped
  • Curry Leaves - 5 to 6
  • Salt - as per taste


Method:

Wash & drain the beaten rice. Add to the beaten rice - salt, finely chopped green chillies, finely chopped ginger & the lemon extract. Mix well & set aside till you cook the other ingredients.

In a pan, pour some oil & add the mustard seeds. Let it splutter & then add the urad dal. When it turns light golden add the whole red chillies. Add hing, turmeric powder & chopped potatoes & cook till it is crispy.

Add the peanuts now if you don't want to cook it separately along with some salt for the potatoes. When the potatoes are cooked then add the curry leaves & cashews. Saute just for a few seconds. The cashews will otherwise get burnt.

Now, add the beaten rice & mix in well with the potatoes. Cover with a lid for about a minute.

Our Aloo Poha is ready to be served!


Note:

  • You may add onions too but I have a sudden aversion to it these days so I am avoiding it
  • Instead of cooking the peanuts with the potatoes, you may roast them separately & do the same with the cashews
  • Sometimes we add some mixture over this
  • My father likes it with some sugar sprinkled over it & sometimes I follow him :)


Monday, October 15, 2012

Lauki Thepla (Spiced Indian Flat-bread)

Gujarati recipes are always liked by my folks at home. This time around I tried the Lauki theplas.
These theplas are not just tasty but also works very well to fill in your tummy. 

During my school days I have always gorged on the tiffin boxes my Gujarati friends would get & finish it off much before the snack breaks. I classify this as a perfect snack! Works fine for breakfast as well.

I dedicate this post to all my Gujju friends! :)

This is a HIT if you travel long distance by train as this spiced Indian flat-bread remains perfect for long hours. It does not require refrigeration however, if you want to store them at home you are free to refrigerate & re-heat as & when required.


You will need:
  • Lauki (Bottle Gourd) - 1 cup grated
  • Wheat flour - 3 cups
  • Green chillies - 3 finely shredded
  • Ajwain (Carom seeds) - 1/2 tsp
  • Turmeric powder - about a pinch for coloring
  • Oil - 1.5 tbsp (for kneading)
  • Salt - as per taste
  • Water- as required (for kneading)
  • Oil/Butter/Ghee - for cooking

Method:
Put all the ingredients into a mixing bowl & knead them together for about 7 minutes. This will be a hard dough. Should not be very soft. When done, cover with a wet cloth for about 20 mts & then roll out the dough log long & divide into equal portions. 
Now, take a portion & place it on the board & use the rolling pin to roll it round just like any other flat bread. while rolling you may want to sprinkle some flour if it sticks to the board.
Heat a heavy skillet or a tava & place the thepla on this. Cook on medium flame or low flame when required as the lauki needs to be cooked well. Use grease on both sides while cooking & press this thepla so it cooks well. When brown spots appear turn & cook the other side.
Theplas are ready!


Note:
  • You may substitute lauki (bottle gourd) with mooli (radish) or methi (fenugreek leaves)
  • I grated the bottle gourd & sprinled salt over it so it releases all the water content. I drained the water before mixing into the flour. Many people do not drain the water off but it might get very sticky so I avoid doing this
  • You may skip greasing the theplas if you want oil free ones
  • Pickles & green chutney are the perfect accompaniment


Friday, July 8, 2011

Mangalore Banana Buns (Deep fried Banana buns)


First ever Konkani Snack I prepared!

Thanks to my dear friend P who introduced me to these wonderful Mangalore Banana Buns.
So, I dedicate this to P & all my 50 followers!


It does not really require any special skills or much effort.
All you need to know is to prepare dough & deep fry.

Yeah! These buns aren't baked but fried.


You will need:

  • Ripe Bananas - 1 cup
  • All purpose flour/Maida - 3 cups or some more
  • Cardamom - 3
  • Sugar - 3 tbsps
  • Curd - 2tbsps
  • Baking Soda - a pinch
  • Oil - for frying

Go for it:

In a large bowl mash the bananas with a fork. This is the best recipe to use up those over ripe bananas. Add sugar & mix it in to dissolve. You could use powdered sugar too. Put the curd & continue to beat them together. Add the flour, crushed/powdered cardamom & the baking soda. Work them together to form dough. You could add more flour if you feel it isnt coming together. Leave it overnight outside.

The dough will ferment & increase in quantity. Take lemon sized dough balls & roll them out round (it's okay if you cant get that shape right ;) ). I used some flour to dust the board & the rolling pin as the dough gets a little sticky.

Deep fry them one by one on medium flame. They will puff up. Turn sides & cook them well. You might have to lower the flame in between as the buns get browned easily. When done, transfer on paper towels to drain the excess oil.

If your buns are soft & smell sweet, they are ready to be relished!

You could enjoy these buns with butter/honey/tangy relishes/jams or just enjoy them plain.

Yes friends, you're all guessing it right. I indulged in these though my fitness trainer doesn't allow ;).

Note:
  • Use up over ripe bananas
  • You could also add crushed pepper, cumin seeds and some salt. I did not want that flavor so I did not add.
  • Many eat these sweet buns with salty accompaniments


Tuesday, June 14, 2011

Oh So Yummy Stuffed Cheela Roll (Stuffed Gramflour Pancakes)

Hello Friends!

I am following a weight loss regime. No! I am not starving at all. I am just eating right & exercising at the gym. I have lost 3 kilos in 4 weeks which is not bad a start. What do you say? :)


I surely do get tempted when I have to cook for my husband but to gain compliments instead of that fat I am ready to sacrifice till I get fitter. Now, that does not mean I dont get to eat yummy food. All you have to do is think of the right ingredients & put them together for that yummy tummy filling food.


Friends! Here are some healthy tips which could help you lose that extra flab:

1. Do not starve


2. Include a good share of fruits & salads in every meal

3. Breakfast should have a fruit/milk/brown bread/oats/juice


4. Drink fresh juices & soups before you get hunger pangs


5. Drink lots of water but make sure you cut down on that oily food so that your body doesnt retain the water you just consumed (Oily snack will have salt which retains the water in your body)


6. If at all you crave to eat any of the following then have it during lunch only - curd/rice/paneer/1 poori/1 pakoda/1 fried papad/aerated beverage/1 sweet/1 portion of pizza/1 bite of that huge pastry/lassi etc. Having none of them or some of them only once in a blue moon is okay


7. Dont eat rice or roti for dinner. Instead have a bowl of any dal (lentil) with loads of salad. You may have 1 roti if you really want. Once in a while rice is okay which means twice a week at the max.


8. Try brown rice instead of white rice.


9.If you dont have a gym closeby then you just start skipping/running or climbing stairs


Some of my confessions:


1. I enjoy a portion of curd or raita during my lunch


2. I hate some fruits which I have to eat & love some fruits which I shouldnt eat


3. I enjoy aamras or a mango shake for breakfast on a Sunday (thatz just an excuse to enjoy mangoes)


4. I have not been able to develop taste for brown rice so once in a week, mostly on saturdays or sundays I eat a rice dish (My birthday yesterday served as an excuse to enjoy Rajma Rice...yummm)


5. After a few days your body feels much lighter & fresh


6. I also exercise at the gym & I am loving myself more & more each day


Cheela/Chilla is a very good option when you plan to lose your extra fat/flab. It is made with gramflour paste. Gramflour consists of dietary fiber & protein.


To enjoy this Oh So Yummy Cheela you need:


Besan (Gramflour) - 1 cup
Ajwain (Carom seeds) - 1/4th teaspoon
Asafoetida - tiny pinch
Red Chilli flakes - as per tolerance
Salt - As per taste
Oil - if reqd.

For the Stuffing:

French Beans  - 100 gms
Carrots - 100 gms
Pepper - for seasoning
Salt - as per taste
Olive Oil - a few drops

Method:

Wash & cut the tip & end of the french beans & keep aside. Scrape & wash the carrots & cut lengthwise.
Put them in a cooker with a cup of water & cook on medium flame till 1 whistle. Put off the flame now but do nto open the lid, let it now cook in the cooker steam. On medium flame, in a non stick pan add some drops of olive oil. Now, discard the water & add the vegetables to this. Saute, add crushed pepper & salt to it. Your stuffing is ready!

To make the cheela (pancakes), just add all the ingredients except oil. A dropping consistency is not too watery or very thick. You will know exactly what I mean when you make the first pancake. You can add more water or gramflour if the consistency isnt quite what you require. Take a ladle full of batter & sprad on the already hot pan. The pan should be on high flame & you should lower it as soon you have spread the batter. You may use a few drops of oil to turn it if required. Else turn it & cook till it is done.

On the cheela place some stuffing in the middle & roll it. Your Cheela Roll is all set! Ready to be Served & Savoured.


Note:

1. There are some variations to this cheela, like:

- You could add some shredded onions, tomatoes & capsicum to this cheela paste
- The stuffing can have more vegetables in it
- You could spread some honey on this cheela & then place the stuffing to roll & enjoy

2. It is best enjoyed with sweet or a tangy dip. I avoided it though.


Saturday, June 11, 2011

Chilli Soya - Snack Healthy


When graduating from Delhi I lived in an all girls PG on rent.
As none of us could cook we, 'the already burdened half-dead freshers' looked out for all possibilities of feeding ourselves with some good food to stay alive.

We found out some numbers/visiting cards of the tiffin providers & zeroed-in on one of the most inviting visiting cards & called to place our very first mass order for dinner. We liked it. Though, the chapattis (flat breads) looked stale & half cooked, the dal was only coloured salty water, the curd had gone sour, the vegetable was covered with oil, yet we enjoyed it & decided to continue the service.

By the time we got back home for lunch the next day it was 3pm & we were famished. We found the tiffin boxes kept at the entrance & we happily picked it up & got ready to eat when I discovered that the vegetable had gone bad in that Delhi heat outside.

It was time to discontinue the tiffin service & engage a cook for fresh meals every day. She cooked good however took leaves without informing. But that did not put us off as those were the opportunities when we could demonstrate our culinary skills & experiment on each other & the food of course. 

On one such occasion a friend got this extremely dry scrubber like balls which she claimed to be edible & called it Soya. I could not believe it could be edible! But,  the vegetable pulao with the soya chunks just tasted fabulous. It was much softer, juicier & yummy. I then started developing the taste for Soya & have tried many dishes since then. One such dish is what I recommend to all those who like your food spicy yet healthy & that is Chilli Soya.

Ingredients required:
  • Soya Chunks - 100 gms
  • Shredded Onion - 3
  • Thinly sliced Tomato - 1
  • Ginger Garlic paste – 1 tbsp
  • Green chillies - as per tolerance
  • Soya sauce - as per taste
  • Green chilli sauce - as per tolerance
  • Red Chilli Powder - 1 tsp
  • Salt - as per taste
  • Oil - 3 tbsps


Method:
Take water in a pan to boil the soya & add salt to it. When done take it off the flame & drain it in a colander. Let it cool down & squeeze out all the extra water out of the chunks. Keep aside.
Now, take a wok & pour oil in it. Keep this on high flame & as soon as it gets smoking hot put the shredded onions in it. Saute & add the ginger garlic paste to it when the onions turn pink.
Leave it to cook for 2 mts on medium flame & then add salt & red chilli powder to it.
Continue to sauté for another 20 seconds & add the thinly sliced tomato to this. Let it cook till the tomatoes get pureed.
Add the soya chunks to this & cook for 5 mts.
Lastly add the sauces to it & cover it with a lid for a minute or two & take it off the flame.
Get ready to serve this healthy snack.

Note:
  • You could add some diced capsicum too
  • If you require some gravy add a spoonful of corn flour to a cup of water then pour & stir for a minute
  • If you don’t have green chilli sauce you could use red chilli sauce or just add extra slit green chillies to the dish. All this only if you could tolerate the taste
  • The  chilli soya (gravy) is best eaten with fried rice
  • The chilli soya (dry) can be added to plain noodles or can be eaten dry as a starter or for snacks


Sunday, February 27, 2011

Onion Crunchies (Pyaz ke Pakode)


Hey friends! Reposting the recipe with my clicks which were missing earlier.

These crunchies taste best with hot tea. We enjoy it whenever it rains in Delhi. You can enjoy them this winter too. When I was younger I have eaten them for lunch with rasam rice & have loved it.

Ingredients:


  • 3 medium sized Onions - thinly sliced
  • 4 green chillies - slit lengthwise & then chopped
  • Red Chilli Powder - as per taste
  • Gramflour (Besan) - 4 tbsps
  • Rice flour - 1 tbsps
  • Salt - As per taste
  • Water - 1/2 cup
  • Oil - for frying


Method:
After slicing the onions just work them with your hands to separate the slices. Now in a separate bowl add the gramflour, rice flour, red chilli powder, chopped green chillies & salt. Pour some water to it & make a paste. The paste shouldn't be very thin or thick. Now, add the onions to this batter. It should be such that the onions stick to it & the batter shouldn't drip. In a wok add oil to fry the crunchies. When the oil is about to smoke scatter small portions of these pakodas in the wok. These will get fried fast as the coating is not major & as the oil was very hot. As soon as you finish adding pakodas into the oil lower the flame. Keep turning them. When they start browning take them off the oil onto paper napkins.

Note:
1. These are best served with green chutney & tomato sauce
2. Riceflour has been used to make it tastier & crunchier


Tuesday, February 1, 2011

Spicy Hot Chilli Cauliflower/Gobhi Chilli

It is a starter & can be commonly found on the restaurant menu in India. 
This is made dry however you can order it with some thick gravy too which is prepared with the sauces.
If you have a liking for spicy food then you are in for a tongue tickling experience.

Here's how you experience it...


  • Cauliflower florets - 3 cups
  • Diced onion chunks - 1 cup
  • Slit green chillies - 10
  • Cornflour - 3 tbsp
  • Maize flour (Maida) - 3 tbsp
  • Salt - As per taste
  • Edible red/orange color - as required
  • Red chilli powder - as per tolerance
  • Red chilli sauce - as required
  • Green chilli sauce - as required
  • Tomato sauce - as required

Method:
In a deep pan boil water with 2 tsp salt. Immerse the cauliflower florets in it & let it cook till just done. Do not over cook it. Take them out when done & dry them on a paper towel. Mean while ready the batter by mixing in the maize flour, cornflour, salt, edible color & water. Be careful while preparing the batter. The consistency of the batter should be just as much to cover the florets well with a thin layer on top.
Now dip the florets & deep fry them in oil. You will not need to wait for long as the florets are already boiled so will cook fast. Now, take them out when done & place them on a paper towel to let the extra oil get absorbed in the paper towel. Next, check the pan/wok for remaining oil in which you deep fried the florets. We now need only 2 tbsp of oil in the wok so if there is extra oil take it out. Heat the oil on high flame & when it is about to get smoky add the diced onions & slit green chillies with salt & some red chilli powder. The onions should not get soft & soggy. You just need to saute them for a minute & then add green chilli sauce, red chilli sauce, soya sauce & tomato sauce & continue to saute for another 30 seconds. Now add the cauliflower florets & mix in with sauces to enjoy the spicy hot chilli cauliflower.

Note:

  • This is a dry dish. To make it with thick gravy just add the sauces in a larger quantity.
  • Some recipes will ask you to directly fry the florets however that will make the florets soggy so better boil them then pat dry before coating with the batter & frying.
  • I have seen my cousin adding diced capsicum to the recipe however I feel capsicum dominates the taste so I prefer not to make it an ingredient in this recipe.
  • You can enjoy them as snacks, starters or with fried rice, roti (indian flat bread).
  • Tomato sauce if put in larger quantity will make the dish sweet so be careful while adding it.


Thursday, December 16, 2010

Adai - Karthigai Poornima

I am back from my vacation so its time for me share with you all my pending recipes for 
Karthigai Poornima.

ADAI - Is a salty pancake similar to dosa. 

Ingredients:

  • Rice - 2 cups
  • Arhar Dal - 1 cup
  • Black Urad Dal - .5 cup
  • Dried Whole Red Chillies - 4
  • Green Chillies - 4
  • Asafoetida (Hing) - 1 pinch
  • Curry Leaves - Few 
  • Black Peppercorns - 5
  • Salt - As per taste


Method:
Soak the rice, arhar dal & urad dal for 3 -4 hours. Now Grind them in a mixer/grinder along with all the other ingredients till the consistency of the paste becomes a little coarse. When I say little kindly ensure that it is only little coarse rest batter should be smooth enough to make the pancakes. You can check it by taking a small dab between your fingers & rubbing it. Don't worry if the paste comes fine as the adai can still be made.
Now, either you can start preparing it now or else wait for a few hours for the batter to ferment & then start preparing them.
It is to be made similar to dosa on the hot griddle while brushing it with some oil so it cooks well & comes off easily if not using a non stick pan.

Variations:

  • You can use white urad dal instead of the black ones too
  • I have tried mixing both black & white together also & even that tastes great


Note:

  • Adai can be eaten as a snack or even for breakfast
  • It is high in protein as we use lentils in it
  • It can be served with Jaggery pieces, tomato sauce or any sweet & tangy chutney
  • You can add chopped onions to the batter also

Saturday, October 2, 2010

Smoked Tandoori Veggies

You think you need a tandoor for this preparation? 
NO! Keep reading :)

Ingredients:


  • Cauliflower Florets - 2 cups
  • Onions - 2 Medium sized
  • Capsicum - 2 Medium sized
  • Baby Potatoes - 10
  • Cottage Cheese (Paneer) - 250 gms
  • Coriander - For Garnishing
  • Lemon - 1
  • Salt - As per taste
  • Oil - 2 tablespoons
  • Chaat Masala - As per taste


For Marination:

  • Curd - 1/2 kg
  • Gramflour (Besan) - 2 tsps
  • Ginger Garlic Paste - 2 tsps
  • Green Chilli Paste - 1 tsp
  • Salt - As per taste
  • Edible Red Color - 2 pinches


Special Ingredients:
Coal - 1 medium sized
Oil - 2 tsps

Method:
In a pressure cooker cook the baby potatoes on medium flame & put it off right after the first whistle. After the steam is out take out the baby potatoes & cool them. Peel off the skin carefully without breaking the potatoes. It should be intact. Poke holes carefully in the potatoes with the help of a fork or a toothpick. Next dice the cottage cheese. Parboil the cauliflower & takeout of the water to cool it.
Prepare the marination paste by mixing all the ingredients together. Now, put the baby potatoes & the cauliflower florets & the cottage cheese in the paste & cover them completely with the coating & leave for an hour.
Meanwhile heat a non-stick pan & add oil. When ready add the diced onions & after 2 minutes add the diced capsicum. Saute till they turn translucent. Now add the cauliflower florets & the baby potatoes with the marination. Saute for another 3 minutes. Now, add the cottage cheese. Cover & cook & continue to saute every second minute for another 10 minutes. When they are done put off the flame & turn them into a bowl & keep aside. Heat the coal on an open flame to ignite it & then transfer it into a bowl. Carefully lift the bowl with the help of tongs & place it on top of the vegetables. Be ready with a lid to cover the larger bowl containing the vegetables. Pour the oil on the coal & immediately cover it with the lid. Leave it for 5 minutes. Then take out the smaller bowl & throw the coal. This is called Smoking which helps us in getting the tandoori like taste. Garnish with coriander & serve hot with chutney. Add the lemon extract & sprinkle some chaat masala for a tang.

Note:
1. You can use ghee instead of oil when smoking
2. You can try making just a tandoori paneer, tandoori gobhi or a tandoori aaloo
3. Best to make for evening snack or as a starter


Friday, October 1, 2010

Wow Poha!

Quite a snack! A very healthy, tasty, easy & time saving snack. Once I got it to the office & all my colleagues loved it. Since then I have started bringing it for them at least once a month for breakfast. There are various variations made by Indians depending on their taste as well as the state they belong to. 


The recipe to make it the WOW way (my way) is...


Ingredients:
Poha (Beaten Rice) - 1/2 kg
Onions - 3 medium size (Thin sliced)
Tomatoes - 3 medium size (Thin sliced)
Potato - 1 medium size (Chopped)
Capsicum - 1 medium size (Chopped)
Green Peas - 1 cup
Peanuts - 1/2 cup
Cashew Nuts - 1/4th cup (Chopped)
Green Chillies - 3 (chopped)
Whole Red Chillies - 2
Mustard Seeds - 2 tsps
Urad Dal - 3 tsps
Curry Leaves - 15 (Chopped)
Lemon - 1
Salt - As per taste
Oil - 1 tbsp
Turmeric Powder - 2 tsps
Red Chilli Powder - 1 tsps


Method:
Wash the poha & drain out the water. You could use a colander. Now add the lemon extract, chopped green chillies, curry leaves & some salt in it. Mix it & keep aside. It will help the poha absorb them.
Now take a pan & pour oil. When it is hot put the oeanuts & saute till it is done. Take them out & keep aside. Lower the flame & fry the cashew. Be careful as it will change color very fast. Take out & keep aside with the peanuts. Now, add mustard seeds to the oil & let it crackle. Then add the urad dal & saute. When it changes color to light brown add the whole red chillies to it & then put the chopped onions to it. When the onions turn pink & translucent add turmeric powder, red chilli powder & salt. Now, add the tomatoes & cover the pan. Let it cook till it becomes puree like. Keep checking as it might get burnt when covered. Now, add the Capsicum, Potatoes & the Green Peas. Cover & cook it is done. Keep checking & stirring the vegetables. When the vegetables are well cooked then put in all the poha & mix in the vegetables properly. Add the peanuts & cashews & mix them again. Now, cover the pan & leave for 2 minutes. Take off the cover & stir again. Check for salt & lemon. If required add & mix again. Your healthy & scrumptious breakfast is ready to be served.


Note:
1. Instead of frying you could even roast the nuts & add to your poha
2. You could add other nuts like almonds & pistas too
3. It will also taste good without vegetables
4. I sometimes make it with onions, tomatoes & nuts only & it tastes awesome!

Travel Ideas

Do Not Copy - All the material unless otherwise mentioned are copyright of © Relish Delish... .

MyFreeCopyright.com Registered & Protected